
When doing impressions for your SnapCorrect aligners, it is very important to capture your teeth as accurately and precisely as possible. All of the aligners for your invisible aligner treatment are made from this one set of impressions, and we need great impressions for your aligners to fit snugly to the teeth.
Thoroughly reading the instructions and watching the video before starting helps tremendously in getting good impressions. However, some impressions may still not pass inspection.
There are two most common reasons for an impression not passing. By solving these two things, you can eliminate most of the chance of your impressions not being workable.
Back Molars Not Being Deep Enough
The most common reason for an impression not being workable is the depth of the back molars. Even if a tooth is visible in the impression, this does not mean that it is captured deeply enough.
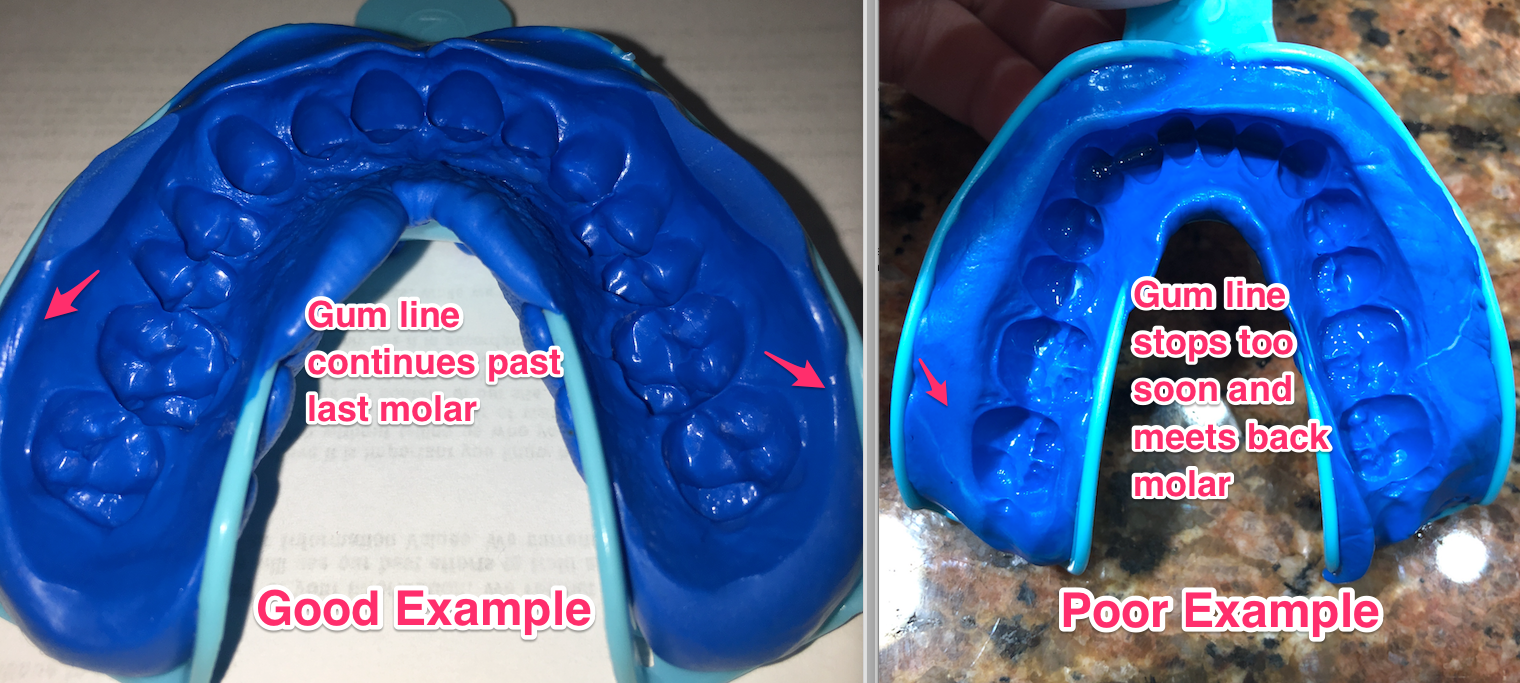
In the following example, the impression on the left has the gum line continue past the last molar. The gum line on the impression on the right is coming down too soon, and meets the last tooth instead of continuing past it. If you are not sure if your back molars are deep enough, feel free to take a photo of your impression and email it to customerservice@snapcorrect.com. In fact, we highly encourage you to email us a photo of your first impression attempt, before proceeding to make more.
If you have wisdom teeth, they can be excluded from the aligners if they are not deep enough. However, the actual back molars still need to be deep enough.
Drag Marks Behind the Back Molar
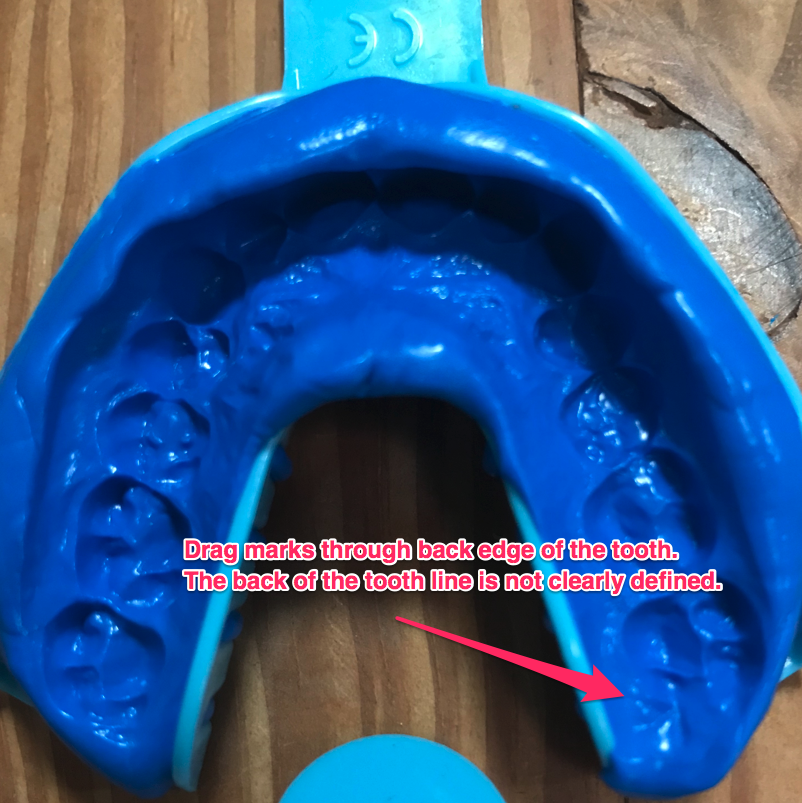
Almost as common are drag marks behind the back molars. This means that the back edge of one or both back molars was lost in the impression, due to the way that the tray was removed.
Usually, this occurs due to the way the tray is removed from the teeth at the end of the 4 minutes. It is important to pull it straight down off of the teeth from the sides (don’t use the handle), and to make sure that it is all the way off of the back teeth before pulling it out of your mouth. If the tray is removed from the mouth while not quite off of the back teeth, this can result in a drag mark.
Another way to help minimize drag marks is by leaving the impression in your mouth for an additional 30 seconds.
The impression below has drag marks on one back molar, but not the opposite one. There is a clear difference between the back molar that has a clear back edge, and the back molar that has lost the back edge due to it being drug through.
Again, if you are not sure if your first impression would be approved (and even if you are), stop and take a photo of it to send to customer service. Our smile experts will be more than happy to provide real-time feedback for you on your impressions.